Thursday, November 13, 2014

I'm still out there ...

I can't believe I haven't posted anything since August, 2013!!!  How quickly time flies.  I'm not going to even explain where I've been ... let's just say I've been busy with life!

It's time again for my annual Christmas Stamp-a-Stack this coming weekend and I want to show you a preview of the cards we'll be making.

Here are the cards we'll be making using the stamp sets Ornamental Pine and Festival of Trees.


Next are cards using Newborn King and Bright and Beautiful.


Lastly, here is a card using the Wondrous Wreath stamp set.


 At my Stamp-a-Stack we make 30 cards -- 3 each of 10 designs.  What, you say there are only 9 cards featured above -- you would be correct.  I'm saving one as a surprise.  You've got to come to the class to see. 

A girl can't show all ...

Have a wonderful day.  Please leave a comment and let me know what you think of my cards.  I'll give details and let you know where I CASEd these cards soon.

Thanks for stopping by.

Linda

Saturday, August 31, 2013

Another Card from August Classes

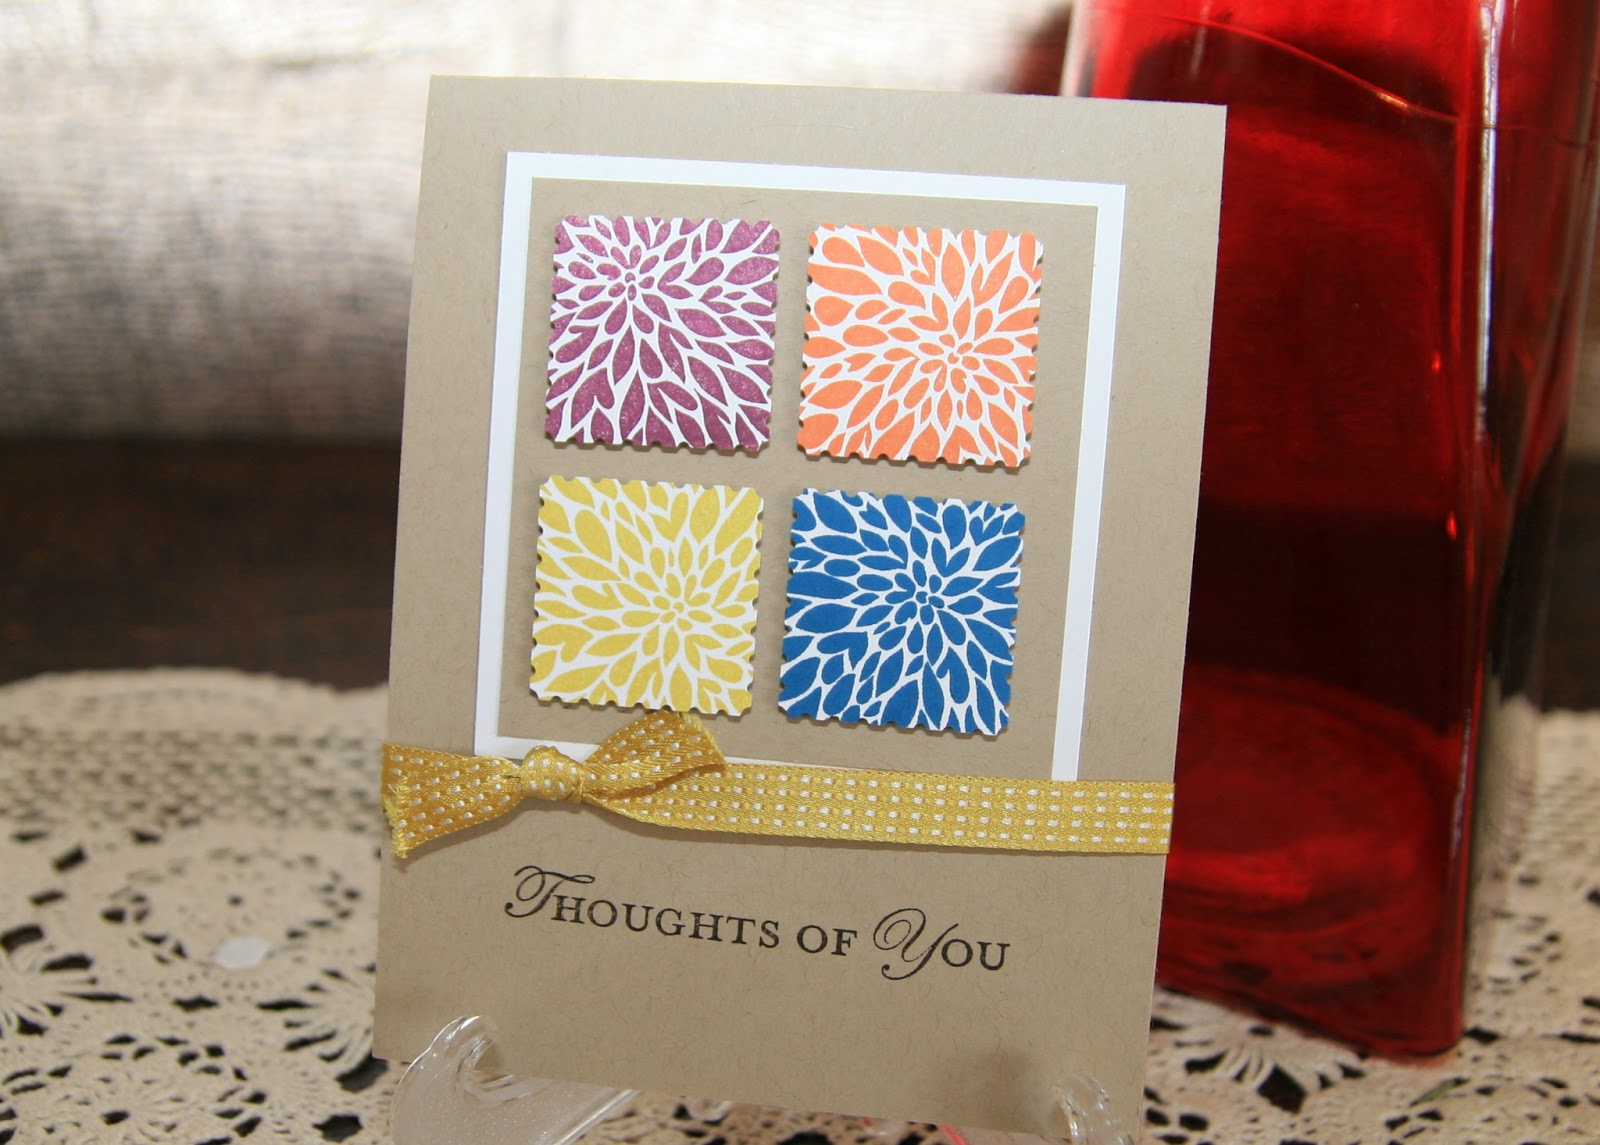
Here is one last card from my August class. I just love the Mosaic Madness stamp set!!!

Very simple.  The colors are Island Indigo, Raspberry Ripple and Whisper White.


Thanks for stopping in.  I'm off to the "Farmer's Market."  Enjoy the long weekend!!

Thursday, August 15, 2013

I'M BACK ...

I know I've been gone for quite a few months but things have settled down a little and I wanted to post some pictures of the cards for my upcoming card class this weekend.

I've been looking at the Daydream Medallions stamp set for a long time.  I finally got it as my Sale-a-Bration redemption reward -- FREE is always good.  So now I'm doubly excited!!

My first card uses Daydream Medallions, Floral Frames Framelits and Banner Greetings.  I loved the color combo of Summer Starfruit, Midnight Muse and Rich Razzleberry.  Those colors make the card POP!!


 One more card using Daydream Medallions and Loving Thoughts.  Color combo is Soft Suede, Crushed Curry and Wysteria Wonder.  The DSP is Afternoon Picnic. I love the banner...


Next stamp set I've been debating about getting is Mosaic Madness.  I wasn't sure so I borrowed my girlfriend's set with the punch -- well, I guess I'll be ordering that bundle because I LOVE IT.  I've been having so much fun stamping and punch with this set.  I also love the new Modern Mosaic embossing folder -- they all just go together so well.

Color combo is Daffodil Delight, Strawberry Slush and Wild Wasabi.  I cased this card from here.  I just loved the flower -- ingenious!!!


Here is another card I cased.  What a beautiful way to showcase the embossing folder.  It makes it look like lace.  In fact, I call this card "mosaic lace."

Color combo is Crumb Cake, Very Vanilla and Cherry Cobbler.  Classic!


Thanks for stopping by.  Come back again.

Linda

Tuesday, February 19, 2013

Some More Cards

I don't have time to post the details for these cards today but I wanted to get them on my blog for my customers. These are the remainder of the cards that we made at my "card buffet" classes this weekend. It was a great stamping time. I hope you enjoy the cards.


Thanks for stopping by.

Linda

Friday, February 15, 2013

What is Paper Pumpkin?

Calling all Cinderella's...Your creativity carriage awaits!


Paper Pumpkin is here for YOU!

Paper Pumpkin comes to your door each month in a fully decked-out creativity carriage! I'll help you escape your life with some paper fun!

Paper Pumpkin comes in a sweet box, but you'll really love what you find on the inside: All the stamps, ink, paper, and accessories to create pinable projects. Create stuff like cards, journals, décor, and more! 

Paper Pumpkin by Stampin' Up! is a new monthly kit program that anyone (even you) can enjoy!
Get Started Creating Right Away

It's so easy to get started. Simply sign up for the program by visiting www.mypaperpumpkin.com.
Every month a new, surprise project kit arrives at your doorstep. Just think of the anticipation of creating a fun project to pin, show off, and share with your friends and family--every month!
Ready to hear more? Here's the skinny!
  • Each month Stampin' Up! will send you a unique, surprise kit with a project-cards, journals, décor, and more! (They've even color-coordinated, measured, and cut everything for you!)
  • Each kit includes stamps, ink, paper, and accessories-everything but adhesive and scissors.
  • Each kit will take you on a 30-40-minute creativity escape. Then you can use the stamps and other things to make more projects on your own!
  • Stampin' Up will ship your Paper Pumpkin on or around the 15th of the month.
  • You need to sign up for Paper Pumpkin by the 10th of the month to get that month's kit. If you sign up on the 11th of the month, your first kit will come the next month. (Let's say you sign up on May 10th, we'll send your kit around May 15th. If you sign up on May 11th, we'll send your first kit around June 15th.) Once the ship date is passed you can no longer get that month's kit.
  • A Paper Pumpkin membership is only $19.95 per month (and shipping is included! How awesome is that???)
  • You can cancel your monthly Paper Pumpkin at anytime. You can also skip a month if you want. So no worries there!
  • While you're registering, a Paper Pumpkin subscription would make a fabulous gift for anyone!
Here's How You Subscribe
Sign up for your monthly Paper Pumpkin today by visiting www.mypaperpumpkin.com and click "Get It." 
Be sure to put in my name as your demonstrator.  
LINDA GRAMES  (and if it asks for my zip code, it is 62035) at the end of the simple registration process, so that I can help you with your Paper Pumpkin subscription should any issues arise.
A Free Gift in Your Very First Kit
The Welcome Kit is the very first Paper Pumpkin box you will receive in your first month of membership. The Welcome Kit includes a free clear acrylic block. You will be able to use it with the clear-mount stamps that will come in each monthly kit.
Starting in early March, you'll be able to try Paper Pumpkin for one month―it's a convenient way to try out the Paper Pumpkin without getting a membership. Just add the Try It kit to your order.
 Try It Kit (item #132599)


Doesn't that sound exciting? Every girl wants to feel like Cinderella and you can too when your Paper Pumpkin arrives at your door every month!  Give it a try today!

Linda

Card Buffet

A quick post today to showcase four of my cards for this weekend's "card buffet." It's basically my stamp-a-stack class but I'm trying something different for the new year. You get to pick which cards you want to make out of a selection of 9 cards.

This first card uses the stamp set Madison Avenue and the Vine Street embossing folder which both are Sale-a-Bration items you can get for FREE with a $50 order.  It looks so cute and springy.  Supplies used:  Primrose Petals, Gumball Green and Daffodil Delight card stock and ink. 


This next card uses another Sale-a-Bration stamp set, Vintage Verses.  Supplies used:  Comfort Cafe DSP, Crumb Cake, Cajun Craze, Midnight Muse and Very Vanilla card stock. Apothecary Accents framelits, Tasteful Trim Bigz die, Perfect Polka Dots and Chevron embossing folders.


I love the colors on this next card -- Pacific Point, Tangerine Tango and Daffodil Delight -- almost summer-like.  The stamp set is Button Buddies and the sentiment is from Curly Cute.  And that is what it is "cute."


The last card I'm going to share is another simple birthday card.  I pulled out a color I haven't used in years -- Bashful Blue.  It's funny how you gravitate to the new colors and forget about the old standards.  I like how it turned out -- what do you think?

Supplies used:  Marina Mist, Bashful Blue and Whisper White card stock, Marina Mist and Chocolate Chip ink; Mixed Bunch stamp set, Stripes embossing folder, Organza ribbon and neutrals brad.


That's it for now.  Hope you enjoyed the cards and stop back real soon!!

Linda

Friday, January 18, 2013

Valentine's Day Cards

It's almost Valentine's Day and I've been busy stamping hearts. Check out my cards I've made for my January Stamp-a-Stack class.

The first card uses the new Hearts a Flutter stamp set (you can get the bundle (stamp set and framelits) and save money) from the Spring Catalog.  I CASEd this card here.


Supplies:  Riding Hood Red, Crumb Cake and Very Vanilla CS; Riding Hood Red ink; Chevron embossing folder, Crumb Cake seam binding.

My next card uses the I Dig You stamp set.  This set was one of the first stamp sets I bought when the new catalog came out in July.  I thought it would be great for scrap booking all of my grandsons' pictures. I was excited when I found a card here that used this set for a Valentine's Card.  I changed it up a bit and I love how it turned out.


Supplies: Cherry Cobbler, Daffodil Delight, Midnight Muse and Whisper White CS; Daffodil Delight, Midnight Muse and Early Espresso inks; Hearts a Flutter and I Dig You stamp sets.


This card uses the chalkboard technique -- white craft ink on black card stock. A simple idea and so easy. The stamp set is a Sale-a-Bration set Vintage Verses. Don't forget Sale-a-Bration starts January 22 and ends March 22, 2013.

The banners on the side are from the Hearts a Flutter stamp set in the Spring Catalog.  I think this turned out nice - I love red, black and white together!

Supplies:  Real Red, Basic Black and Whisper White card stock, Whisper White craft ink, Real Red and Basic Black ink; Labels Collection framelits and Perfect Polka Dot embossing folder.


This card uses the new More Amore Specialty DSP from the Spring Catalog. I also used the Cannery stamp set and framelits. I love that little mason jar.  This time its filled with little hearts for Valentine's Day.  The hear is from the Create a Cupcake stamp set.

Supplies: Crumb Cake, Pool Party and Very Vanilla card stock; Primrose Petals, Pool Party, Crumb Cake and Basic Black ink; Tiny Tags and Delightful Dozen stamp sets; Pool Party baker's twine and Jewelry Tag punch.


The last card uses the Hearts a Flutter and Wacky Wishes stamp sets.  Simple but cute.  The card says Wishing you a ... Happy Valentine's Day (on the inside).

Supplies: Pretty in Pink, Melon Mambo and Whisper White card stock; Pretty in Pink, Pink Pirouette and Melon Mambo ink; Chevron embossing folder; Rhinestones.


I hope you enjoyed looking at my Valentine cards,.  Come back soon.

Linda

Saturday, January 5, 2013

Remainder of Christmas Stamp-a-Stack

It's been so long since I posted on my blog. Life just sometimes gets in the way - LOL!! Anyway, here are pics of the remainder of of Christmas Stamp-a-Stack cards. I hope you enjoy.


This turned out to be one of my favorites.  I CASEd this card here.  Inked the Lacy Brocade embossing folder with crumb cake before embossing the crumb cake card stock to give it that distressed look.


Can't remember where I found the above card so I can't give credit where credit is due ... sorry!


This was such a cute idea of die cutting the Christmas tree in the center of the card and then placing DSP behind it -- I just had to CASE it here.


I LOVE banners so I just had to include them on my Christmas cards.  I got the idea here.


I wanted to try the new Core'dinations card stock.  Very easy to sand and it gives a nice textured look to this card.  I got this idea here.

Thanks for stopping in to check out my blog.  My New Year's resolution is to blog more!!!

Linda

Monday, November 5, 2012

Christmas is Coming!


It seems like it's just around the corner.  This year has went to fast.  Since I've had that feeling a lot lately, I decided to get started on making my cards for my big Christmas Stamp-a-Stack.  I design 10 cards and attendees get to make 3 of each design.  It's a fun afternoon and we always get into the Christmas spirit.  This year my Christmas Stamp-a-Stack is November 10 and 11.  I like to hold it two days so my classes can stay small.  There are so many exciting products in the Holiday Catalog that it's hard to know what to use.  I started with the lovely Holiday Frame Embossing Folder.  I knew the minute I saw it I wanted it!!  Has that ever happened to you?

I have to admit that I cased these cards.  That's actually how I start to create for my classes. I see what products or stamp sets I want to use then I go "surfing."  Actually, maybe it's more like stalking, LOL!!  Here is where I found this lovely card.  I used Cherry Cobbler and Early Espresso ink, Cherry Cobbler and Whisper White card stock and Cherry Cobbler seam binding.  So simple but so elegant!


This next card is similar but I used Very Vanilla instead of Whisper White, Gumball Green base and I added a scalloped trim on the sides in Cherry Cobbler.  I just had to try the new scalloped tulle ribbon.  It's so easy to work with.  This card uses the Joyous Celebrations stamp set from the Holiday Catalog (pg. 7) along with the Holiday Frame embossing folder.  I was inspired here for this card.


Here's another card using my Holiday Frame embossing folder, the Ornament Keepsakes stamp set and Holiday Ornaments framelits. At  my Christmas Stamp-a-Stack I design 10 different card designs and everyone gets to make 3 of each.  I thought it would be nice on this card that they can decide if they want 2 in Gumball Green and 1 in Cherry Cobbler or any combination of this card.  It's so simple yet is so "christmasy" ... is that a word?  Well, it is in my book, LOL!!  Here is where I found this design.


Same card as above but in Cherry Cobbler ...


Thanks for stopping in and checking out my sneak peek at my Christmas Stamp-a-Stack.  If you live in the Alton/Godfrey, IL area, please let me know if you want to come to my classes this weekend ... Saturday and Sunday.

See you soon ...

Linda

Tuesday, October 9, 2012

Oops ... Almost Forgot


I posted my September Stamp-a-Stack cards but forgot this last one.  I was reminded by one of my customers.  Sorry about that, Antoinette!!!  I also apologize for the photo.  I took it with my cell phone but I think you can still see the lovely quilt card I made using the Comfort Cafe DSP.  After placing the small quilt squares on a Midnight Muse square of card stock, I embossed it using the Square Lattice Embossing Folder.  It's a simple card but it reminds you of a warm, homey quilt!


Supplies used:  Curly Cute stamp set; Comfort Cafe DSP, Very Vanilla, Soft Suede and Midnight Muse card stock and ink; Soft Suede ribbon, Square Lattice embossing folder.

Have a great day.  Enjoy the beautiful fall season.

Linda

October Stamp-a-Stack Cards

I can't believe I'm posting pics of some of my cards for my October classes.  My Stamp-a-Stack classes are not until October 20 and 21!!  Since I work for the U.S. Postal Service I had a long 3-day weekend -- Monday was Columbus Day.  I decided to take advantage ot this past weekend and try to work ahead.

It helped that I had new "toys" to play with -- the Autumn Accent Bigz die, new stamp sets and new Designer Series Paper.  As I was working, I realized I definitely have a "leaf" theme to these 3 cards.  I hope you enjoy looking at what I created this weekend. 

The first card I cased from someone on SplitcoastStampers, however, every time I went to her blog my anti-virus software gave me a warning.  Once again, I loved it so I didn't change much I just used stuff I had so a few things had to be changed.  What do you think?

Supplies used:  Gently Falling & Teeny Tiny Wishes stamp sets; Pumpkin Pie, Cajun Craze, More Mustard & Old Olive card stock and ink; Whisper White card stock, Linen Thread, Square Lattice Embossing Folder, sponges, Autumn Accent Bigz die, Bright Brads, Word Window and Modern Label punches.


This next card also cased here.  Yes, I do create some things by myself, in fact, check out the next card because most of that card was a "MamaDog" original. Anyway, this card uses a color combination that I never would have put together -- Gumball Green, Summer Starfruit and Cherry Cobbler.  Wild, hah?  Do you like the veins on the leaves?  Can you guess what I used?  Give up?  I used the Spider Web embossing folder!!  Crazy!  That was a trick I learned from the Stamp Lady Katie. Check out her blog.


Supplies used:  Gentle Falling & Itty Bitty Banners stamp sets; Crumb Cake & Whisper White card stock; Cherry Cobbler, Summer Starfruit and Gumball Green ink; Square Lattice & Spider Web Embossing Folders; Summer Starfruit ribbon; Autumn Accents Bigz die and Bitty Banner framelits.

Okay, this is my MamaDog original but I was inspired by this card .  I LOVED the colors used so I just made it my own.  I used the emboss resist technique on the Tweet Leaves stamp.  I stamped in VersaMark on Very Vanilla, used clear embossing powder and then sponged Lucky Limeade, More Mustard and Island Indigo ink over the image.  I think is a WOW!!  Have you noticed that the hottest think in paper crafting is the banner.  It's everywhere!!


Supplies used:  Tweet Leaves & Friendly Phrases stamp sets; Island Indigo, Early Espresso, Very Vanilla and More Mustard card stock; Orchard Harvest DSP; More Mustard, Lucky Limeade, Island Indigo and Early Espresso ink; More Mustard (retired) brads; Autumn Accent Bigz die, Early Espresso ribbon.

Thanks for stopping in to see what I did this past weekend.  It was a wonderfully cool fall weekend and I spent it stamping -- LIVE IS GOOD!!

Linda

Sunday, September 23, 2012

What a Wonderful Day

Saturday was our Stampin' Up group event here in St. Louis called Happy Holidaze.  We hold this event every fall after the Holiday Catalog comes out.  Everyone in our group is so talented and it's always fun to share ideas especially as we start getting ready for the holiday season.

Well, this event was everything I needed to renew friendships and get my creative juices flowing.  I demonstrated a new technique I saw on Splitcoast Stampers called "water stamping."  I wasn't sure how it would turn out but everyone loved my card samples.  Here is one of the cards I created using the water stamping technique.


I sponged Cajun Craze and Tangerine Tango onto regular Whisper White card stock.  Using a pie plate or other container you wet a layer of paper towels with water.  I layered 3 sheets of paper towels and added water.  You want your paper towel pretty wet but not wet enough to drip out of the plate when you hold it up.  I hope that makes sense.  Any way that wet paper towel becomes your stamp pad.  In the sample above I used the Gently Falling two-step stamp set (pg. 86 Annual Catalog).  I took the inside of the leaf stamp (not the outline of the leaf stamp) and tapped it on the wet paper towel and then stamped onto my sponged card stock.  You want to have plenty of water on your stamp and hold it down on the card stock for a few seconds for the best results.  Letting the card stock air dry works best but you can use your heat gun.  If the card stock rolls from being wet, use an iron to flatten -- iron it on the wrong side.  It's also important to pick a BOLD stamp that has lots of rubber surface for the water to adhere to.  Very fine delicate or outline stamp sets will not work as well.

It's hard to see in the picture but the images of the water stamped leaves are very muted and subtle.  I think it made a fabulous fall card.  What do you think?

I also designed a make 'n take card using the new Illuminate Glimmer Watermark Stamp Pad (pg. 23 Holiday Catalog).


I apologize for the photo, I took it on my phone.  The snowflakes are from the Snowflake Soiree stamp set (pg. 5 Holiday Catalog) stamped in the Illuminate Glimmer Watermark ink on Midnight Muse card stock.  Peace on Earth is from the Greetings of the Season (pg. 8 Holiday Catalog) and has been embossing using the silver embossing powder.  Other layers on the card are Whisper White and Brushed Silver (pg. 160 Annual Catalog).  The picture does not show how beautiful the card is.  It really shimmers!!

Well, the most exciting part was after I demonstrated water stamping and prepared the make 'n take card, Sally (who organizes this event) gave me a gift.  What a gift it was -- an APPLE PIE IN A JAR!  Now, at first I thought it would be a jar filled with ingredients to make an apple pie but NO it's really a baked apple pie in a jar!!  I just had to take a picture of it to show all of you.  Here it is:


Sally's friend Mary made this wonderful gift.  She used the Orchard Harvest Designer Fabric(pg. 30 in Holiday Catalog) on the lid and made a cute gift tag using the Orchard Harvest Designer Series Paper.  Mary baked the pie on Friday and it's supposed to be good for 7 days.  I think I may eat it tonight after dinner!

Here's a pic of it open:


Isn't it just the cutest little apple pie?  I'm going to Google "apple pie in a jar" to see how they did it.  I think I'll warm it up in the microwave and eat it with a scope of vanilla ice cream ... yummy!!!

Thanks for stopping by.  I'll have more pics this week of the other make 'n takes we made on Saturday.  Have a great week.

Linda

Tuesday, September 18, 2012

Stamp-a-Stack Cards

I've been a bad girl!! I failed to post my stamp-a-stack cards before my classes. I'm not sure how time gets away from me so quickly. Well I say, "better late than never." So here are some of the things that are keeping me busy: My first two cards use the new elegant butterfly punch. The name says it all -- it is an elegant punch. I cased this first card here. I changed it up a little but I hope you like it.

This next card I cased here. It was so perfect that I didn't change a thing.

I can't believe I'm making Halloween cards already.  I love Halloween so I had go get the cute little "Googly Ghouls" stamp set (and, of course, the googly eyes!!)  I cased this card here and changed a few things but I liked the looked.

 
 Another cute Halloween card using the "Bootiful Occasion" stamp set.  I just LOVE those boots in that stamp set so, of course, I had to use the witches boot.  I cased the card here.


I've got one more card that we made at my Stamp-a-Stack classes but I've got to get my camera out again and take a quick pic.  Come back tomorrow to see that beautiful card made using Comfort Cafe DSP.

Thanks for stopping in.  Have a great day.

Linda