Thursday, November 10, 2011

Christmas Stocking Scrapbook

Check out this adorable mini scrapbook that I designed.  I have to admit -- I usually CASE (copy and share everything) what I make.  I search other blogs or go to Splitcoast Stampers and find great ideas from other demonstrators.  However, I was to make a scrapbook for my stamp camp and one of my good friends suggested I use the new Christmas stocking die.  So here it is:


Here is a peek at the backside front cover and the first page.  The remainder of the pages are basically just the stockings with coordinating heels and toes.  I decided to leave the pages simple so your photos can be the highlight of the scrapbook.  It's mini but you can still add about 10 or more cropped photos. 


I'll post pics of every page soon so stay tuned and check back!

Thanks for stopping by.

Linda


Tuesday, November 1, 2011

Christmas Stamp-a-Stack Sneak Peek

Good morning!  I'd like to share some photos of my annual Christmas Stamp-a-Stack class.  I always enjoy this class because it's a time I can spend with my customers stamping, chatting, laughing and eating.  We have such a fun time.  I usually hold the class at my house two days and this year I can do it on a Friday during the day because it's Veteran's Day and I don't have to work at my USPS job.!!!  Attendees have a choice of making 10 cards (1 of each design), 25 cards (2 of each design + 5 more) or 30 cards (3 of each design).  Many of you have asked to see samples of the cards -- well here they are!  I'm using many things from Stampin' Ups! fabulous Holiday Mini Catalog.  So if you are in the St. Louis area and would like to attend, please let me know.  I'd love for you to join us!

Cards made using:  Frostwood Lodge DSP, Christmas Lodge, Pines & Poinsettias, The Sounding Joy and Hand-Penned Holidays stamp sets.

Cards using Snow Burst, Northern Flurry and Petals-a-Plenty Embossing Folders, Northern Frost Sizzlits Decorative Strip Die, Stocking Building Punch with Red Glimmer Paper, Contempo Christmas and Curly Cute stamp sets.


Cards using Christmas Lodge, Curly Cute and Contempo Christmas stamp sets; Blossom Petals Building Punch with Silver Glimmer Paper; 3" Circle Die; Star Punch and Snow Burst Embossing Folder.

Seven of these cards were from a class I took (it's so nice to be a customer once in a while) held by fellow demo, Sally Nusbaum.  She's a great friend and awesome demo -- love ya, Sal!!  So for the cost of the class I was able to get these great ideas to use in my class.  Why reinvent the wheel when someone has done it already!!

The other two cards -- Folded Christmas Trees and Silver Glimmer Poinsettia were CASEd from blogs.  I can't remember from where I got the glimmer poinsettia but I found an example of the folded Christmas tree card here.  I can't find the one I actually CASEd but this gives you an idea.

I've not yet decided on the 10th card design.  Any suggestions???

Thanks for stopping by.  I hope you like my Christmas cards -- please leave a comment. I love to hear from you.

Linda

Monday, September 12, 2011

More Cards ...

Here are two more cards for my Stamp-a-Stack. The first one uses the new Easy Events stamp set.  This is a set I got for free for my Sale-a-Bration sales.  I was inspired by a challenge here.  I love the simplicity of the card.  You can't tell by the picture (or maybe you can) but the frosting on the cupcake has a little dazzling diamond bling!


Supplies used: Easy Events and Happiest Birthday Wishes (hostess) stamp sets; Not Quite Navy, Baja Breeze, So Saffron and Whisper White card stock; Stazon and Early Espresso ink; Baja Breeze, So Saffron and Early Espresso markers; 1 3/4" Circle and 2 3/8" Scallop Punches and Circles #2 Die; Early Espresso grosgrain ribbon; Dazzling Diamonds and Stampin' Dimensionals.

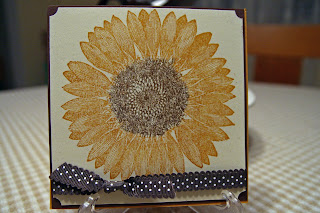
This next card I CASEd here.  I just loved the "pop-up" card design and I wanted to use my new Sunflower stamp. Marie referred to it as the "twisted easel card."  It's really easy -- cut a piece of card stock at 5 1/4 x 10 1/2.  Score in half at the landscape position (5 1/4) and then score again diagonally from bottom left corner to top right.  When you fold the diagonal score, you'll place the card front on the bottom portion.  This card will fold flat for mailing.


Here's a close-up of the card "popped up."


Supplies used: Sunflower and Faith by Nature (hostess) stamp sets; More Mustard, Chocolate Chip, Naturals Ivory card stock; Chocolate Chip and More Mustard ink and markers; Chocolate Chip Dotted Scalloped Ribbon; Ticket Corner Punch; 5/8" Brads and Stampin' Dimensionals.

Thanks for stopping in.  Leave me a comment if you like.  I love hearing from you.

Linda

Thursday, September 1, 2011

I'm Back ...

Back in June I decided to take the months of July and August off.  You know ... everyone needs a chance to rest, relax and enjoy the long summer days.  I had visions of getting caught up on my scrap booking ... heck, who am I fooling ... I wanted to just get a few small projects done!  I also had visions of taking long walks with my dog, sitting on my patio reading a good book or working on all the unfinished knitting projects I have started.  Well, don't we all imagine that with some time off from the craziness of life we can accomplish so much.

Okay ... so here is the reality ... I didn't do ANY scrap booking, I started a book but only got about a fourth of it read and only finished two knitting projects and started 3 more (which are now on my unfinished list)!!!

So I'm actually glad to be back to creating cards and my monthly Stamp-a-Stack classes.  I'm also very excited about the new Holiday Mini that just came out today!  I get so excited when I see all the holiday stamp sets and projects.  I can't wait to get my Halloween stamps sets that I just ordered.

Here is one of the cards that my "peeps" will be making this month.  It uses the new Domestic Goddess DSP.  I just love the colors:  Pool Party and Calypso Coral.  I CASEd the card from here.  I paper-pieced the little coffee cups using the Pool Party check paper from Domestic Goddess DSP and Calypso Coral CS. The remainder of the cups I colored with the markers.  It really "pops" off the front of the card!

Supplies used:  Morning Cup Stamp Set; Crumb Cake, Calypso Coral and Whisper White CS; Stazon ink; Domestic Goddess DSP; Pool Party ruffled ribbon; Crumb Cake, Pool Party and Calypso Coral markers; Scalloped Eyelet Border Punch, Crimper.

The next card uses a stamp set that I just got as an reward for my sales during Sale-a-Bration.  It's so much fun to get FREE stamp sets from Stampin' Up.  It's called Inspired by Nature and I've wanted it for some time so, of course, I had to use it right away.  I used markers directly on the stamp to use multiple colors.  I CASEd it here -- it's just clean and simple.


Supplies used: Inspired by Nature and Happiest Birthday Wishes (hostess) stamp sets; Old Olive, Pink Pirouette and Whisper White cardstock; Old Olive, Pink Pirouette and Chocolate Chip markers; Old Olive Satin Ribbon.

Thanks for stopping by.  Check back for other cards that I'll have at my September Stamp-a-Stack classes.

Linda


Wednesday, August 24, 2011

Got a little crazy ...

Okay, I realized that I haven't posted for over TWO months.  What can I say ... it's summer and life gets a little crazy.  First, I went on vacation with my hubby in June to Memphis, TN.  I've always wanted to see Graceland and I finally did it.  It was not what I expected -- smaller and totally 70s.  But, I must admit I got a little sad thinking about Elvis' life and how it ended so quickly.  He was a very handsome and talented man! 

We stayed at a lovely Bed & Breakfast in Hernando, Mississippi.  Check out my new profile picture -- that is my husband, Art, and I on the staircase in the Magnolia Grove B&B.  It was truly a wonderful place.  The hosts put out two pieces of homemade cake every evening for us to enjoy.  One night we sat out in the gazebo with our cake and a glass of wine.  It was very romantic except for the mosquitos!!

My second vacation was with my immediate family.  Every year my two granddaughters, Courtney & Megan, come down to the St. Louis area for a visit.  They are 16 and 14 and live in Monroe, Wisconsin.  They came to visit the last week in July.  We had so much fun shopping, swimming and painting our fingernails and toes with the new OPI Shatter polish!  We bought turquoise, purple/pink and, yes, even lime green polish and then painted the black or white "shatter" polish over the top.  Here are what my toes look like:


I'm really like the "shatter" look!!

I then drove back to Wisconsin with them. My daughter, son-in-law and their son (my grandson) (Melissa, Paul and Tyler) and my son, daughter-in-law and their son (my grandson) (Ryan, Leslie and Hunter) -- along with Courtney and Megan (also Ryan's two daughters) -- went to Door County, Wisconsin for our family vacation.  We stayed at the Bridgeport Inn in Sturgeon Bay, WI and had a wonderful time.  I even got to visit a yarn store in Sturgeon Bay.  I'll post about that another time!

When I returned to my daughter Melissa's home for the remainder of my stay, I got my haircut by her best friend, Tanya.  SHE talked me into the "feather."  So ... what do you think?  Everyone at work thinks I'm a little "funky" but I love it.  I also colored my hair to be more of a "black cherry" color.  The contrast of the purple spikes and the chartreuse/black feather are quite WILD!  I must say ... I got a little crazy on vacation!


Thursday, June 9, 2011

One Sheet Wonder

Since it's now summer -- maybe not officially but definitely by the heat and humity -- it's time to take it easy!  Wtih that thought in mind, I decided not to "reinvent the wheel" for this month's Stamp-a-Stack classes.  I decided to use the beautiful One Sheet Wonder cards that were created by the Design Team (Sally Nusbaum and Mary Derhake) for the Gateway Glitter 'n Ink Celebrate Summer Demonstrator Event which was held on May 14th.  It's been a long time since I've done a One Sheet Wonder (or OSW as I like to refer to it) but I'm not sure why because it's so easy and quick.  We used the Flower Fest stamp set from the new Summer Mini Catalog with bright, bold colors like Daffodil Delight, Pacific Point, Melon Mambo, Tangerine Tango and Wild Wasabi.  Those colors are sure to remind you of summer!  We just randomly stamped the outline images of the stamp set all over a 8 1/2 x 11 piece of Whisper White cardstock.  To help the images "pop" off the paper we sponged the corresponding color in the center of the stamped image.  I don't think my pictures capture the bold, bright colors but I hope you all get the idea.  Check out these quick and easy cards we made out of one sheet of  stamped cardstock (with leftovers):


Used the Island Floral die, Perfect Polka Dots Embossing Folder, Extra-Large Flower Punch and White Grosgrain Ribbon.

Used the Triple Layer Blossom and Boho Blossom Punches, Tasteful Trim die and Basic Pearls.

Used the Butterfly and 1/4" Circle Punches.

Used the Perfect Polka Dots Embossing Folder.  This one I created myself (that doesn't happen that often, LOL!!!)

Used the Triple Layer Blossom Punch and then ran the top layer through the Square Lattice Embossing Folder.


Thanks for stopping by and taking a look. Enjoy the summer weather!!

Linda

Monday, May 16, 2011

April Showers ... Bring May Flowers!

I don't know about all of you but I'm tired of all the rain! Here in the St. Louis area we had the April showers and May showers -- now bring on the sunshine!! I decided we need to see some flowers so this month's theme for my Stamp-a-Stack classes is "April Showers ... Bring May Flowers." Check it out.

This first card uses the new Fabulous Florets stamp set from the Summer Mini.  I wasn't sure about this set and now it's my favorite. Go figure!!  I cased the card here.  Supplies used: Melon Mambo, Pretty in Pink, Old Olive and Whisper White CS; Melon Mambo, Pretty in Pink, Old Olive and Early Espresso ink; Old Olive satin ribbon and Stampin' Dimensionals.


This next card uses the same stamp set.  It's very clean and simple and I love the crispness of the white with the bold melon color.  I cased the card here.  Supplies used:  Whisper White and Melon Mambo CS; Old Olive and Melon Mambo ink; Perfect Polka Dots embossing folder; Whisper White organza and Old Olive taffeta ribbon (I placed the two ribbons together with a little Snail adhesive and tied them together -- cute, uh?) and Stampin' Dimensionals.


This next card was a "buddy swap" card I received from one of my favorite demos, Rita Parker.  I always enjoy getting a card from Rita.  She didn't let me down this time ... check out this adorable flower pot card.

Supplies used:  Pear Pizzazz, Daffodil Delight, Not Quite Navy, Peach Parfait and Whisper White CS; Peach Parfait DSP, Not Quite Navy ink; Punches: Blossom Bouquet Triple Layer (new in Summer Mini), Scallop Circle, 1/2" Circle, Scallop Oval XL and two smaller Oval punches; Daffodil Delight satin ribbon, Pearls and Stampin' Dimensionals.


This card uses my second favorite stamp set from the Summer Mini Catalog -- "On the Grow."  It's so cute and fun to color.  I love the little scooter.  I'll have to make a card using the scooter.  I cased this card here.  Supplies used: Crumb Cake, Basic Gray, Certainly Celery, Not Quite Navy, Baja Breeze and Watercolor Paper CS; Elegant Soiree and Newsprint DSP; Stazon, Baja Breeze, Certain Celery and Basic Gray ink; Scallop Border and Modern Label punches; Very Vanilla Taffeta ribbon; Aqua Painters and Stampin' Dimensionals.


Thanks for stopping in and looking at the May flowers!!

Linda

Tuesday, May 3, 2011

Gracie & Mylah Bug

I've been enjoying my renewed hobby of knitting. I made many Christmas gifts for the family but I wanted to make some special items for my many grandchildren. Of the 12 grandchildren I have -- 8 of them are girls. It's easy to make cute little sweaters, dresses, hats, etc. for the little girls. I found a pattern for a 5-hour sweater. It looked easy so I gave it a try. I wanted to make it for Easter for my youngest granddaugher, Mylah, who is 20 months old. I actually would have got it done in about 6-7 hours but I found a mistake half-way through and I had to rip out a lot of it. That set me back and it actually took me 5 DAYS to finish the sweater!! Here is what my sweet little Mylah bug looked like wearing it:


Isn't she just the cutest little thing -- check out the little piggy tales!


After I was successful making Mylah's 5-hour sweater, I thought I would try a matching one for her big sister Grace who is 4 years old.  Unfortunately, I got busy with plans for our church's Easter Egg hunt and my monthly card classes so Grace's sweater took a little longer to make.  However, I got it done.  Isn't she a little ham!  She wanted to pose on my porch for her picture.   I think both the sweaters turned out adorable and, of course, so are the girls!


Thanks for stopping in. Leave me a comment if you like -- I always like to hear from my followers. Have a great week.

Linda

Monday, May 2, 2011

May is National Scrapbooking Month ...


and Stampin' Up! is having a great promotion -- 30% off selected stamp sets, digital downloads and My Design Studio print products.  Click on the link here to see all that is on special for the month of May.  Consider trying something new during Stampin' Up!'s National Scrapbooking Month Promotion -- maybe purchase a stamp set designed to be used for scrapbooking or host a workshop with me and I'll be glad to show you and your friends ways to make preserving your memories fun and easy.  If working with paper and stamps doesn't appeal to you, give Stampin' Up!'s My Design Studio a try -- it's a digital designing software with Stampin' Up!'s exclusive designs, artwork, colors and templates.  You can purchase fresh, new designs for your software all the time.

 If you're not sure which way to go -- traditional paper or new digital scrapbooking -- give me a call and I can show you ease of both. 

Whatever you do, just enjoy the month of May and scrapbook some memories!

Thanks for stopping by.

Linda

Monday, April 25, 2011

Easter Kisses

Look at the cute "kisses" I made my grandchildren for Easter. They are made out of Rice Krispie Treats. I can't remember where I saw the idea but I thought it was so adorable to make "Gram 'n Grampy Kisses for the little ones. They were very easy to make -- use the original Rice Krispie treat recipe, spray a large plastic funnel with cooking spray, either butter or spray your hands and mold the Rice Krispie treats into the funnel -- pressing firmly. I then placed them on waxed paper to cool and set. I wrapped the treats using the "non-stick" aluminum foil (just to be sure the foil didn't stick to the treats -- I didn't want the little ones trying to pick foil off of their delicious treats) and made cute little "banners" that read -- Gram 'n Grampy Kisses.

I made big ones for my grandchildren and little ones for our nieces and nephews that said "Grames Family Kiss."  Everyone loved the special Easter treats. 

I hope you all had a very Blessed Easter!

Linda

Thursday, April 21, 2011

More Punch Cards


Here are my last three cards from my "Let's Get Punchy" stamp-a-stack. I was inspired for the first card here.  I love Ilina's blog so hop on over and check her out.  Many times I go to her blog for inspiration.  It doesn't look like it in the picture but I used Pear Pizzazz card stock.  I think the lighting was bad in my dining room and my camera doesn't have a flash.  The stamp set is Strength & Hope which you can purchase starting May 1st and Stampin' Up will donate $2 to The Breast Cancer Research Foundation.  It's a beautiful stamp set for a wonderful cause.  Don't forget to order your set after May 1st.

Supplies used:  Strength & Hope and Teeny Tiny Wishes stamp sets; Whisper White, Pear Pizzazz and Early Espresso card stock; Designer Series Paper Pack (Level 1 Hostess); Pear Pizzazz and Early Espresso stamp pads; Circles #2 Die; Scallop Trim Border punch; Pear Pizzazz Seam Binding; Basic Pearls and Stampin' Dimensionals.

This next card uses the sneak peek stamp set Four Frames.  You can get this stamp set as part of the Spring is Blossoming promotion -- if you purchase $20 in merchandise you can buy this set and the Paisley Petals DSP both of which will be in the new 2011-2012 Idea Book & Catalog.  But hurry the promotion ends on April 29th.

I CASEd this card here.  It is another one of Ilina's creations.  I tried my hand at ruffling the ribbon by pulling out a thread from the center of the ribbon -- it was harder than I thought and I decided to just let my customers tie a knot with the ribbon -- much less stress!!

Supplies used:  Four Frames and Teeny Tiny Wishes stamp sets; Whisper White, Rose Red, So Saffron and Wild Wasabi card stock; Stazon, Rose Red and Wild Wasabi markers; Perfect Polka Dots embossing folder; Rose Red Seam Binding; Decorative Label punch; Stampin' Dimensionals.


Sunday, April 17, 2011

Happy Mother's Day


Here is one of the cards we'll be making at this month's stamp-a-stack classes -- it is a beautiful Mother's Day card using the Build a Blossom stamp set and the Blossom Petals Punch both from the Occasions Mini.  I just love the big flower.  I loved it so much that I tried it using a different color.  Here is my Not Quite Navy card ...

Which one do you like better?  I think they are both beautiful.  I CASEd this card here.  I actually borrowed my friends punch and stamp set for the class because I wasn't sure I liked it -- well, now I have to have it, LOL!!!  Supplies used on both cards:  Build A Blossom, Teeny Tiny Wishes stamp sets; Rose Red, Not Quite Navy, Always Artichoke and Pear Pizzazz Stampin' Pads; Rose Red, NQ Navy, Always Artichoke, Pear Pizzazz and Whisper White card stock; Springtime Vintage DSP; Blossom Petals Punch, 1" circle punch (for base of flower); 3/4" circle punch (for center of NQ Navy flower); Modern Label Punch; Rose Red Seam Binding; Whisper White Taffeta Ribbon; Vintage Flower Adornments, Glue Dots and Stampin' Dimensionals.

Thanks for stopping in.  Have a fantastic week.

Linda

Thursday, April 7, 2011

Let's Get Punchy ...

I thought it might be fun to have a theme for my Stamp-a-Stack classes this month.  I finally bought the Two-Step Bird punch.  I wasn't sure about the little bird but I see so many other things that you can make with those punched pieces -- like the beautiful flower in my previous post.  Now, I must admit I don't always like some of the crazy things that people make from the punches like animals, people, etc.  But you can use Stampin' Up! punches in so many ways I wanted to highlight them this month. 

This card I CASEd from here.  I realized after I took the picture that I forgot to stamp a sentiment on the front.  You know sometimes my customers like to do that because then they can stamp the sentiment when they know what they need the card for -- birthday, get well, thank you, etc.  That makes sense so I may just leave this card blank until I need to use it.

Supplies used:  Card stock:  Crumb Cake, Baja Breeze, Soft Suede, Very Vanilla and DSP; Ink:  Well, I didn't stamp anything ... LOL ... but I did sponge around the bird and the scallop circle using Baja Breeze and Crumb Cake; Punches: Two-Step Bird Punch, Extra Large Scallop Circle Punch, Circle Die; Sponges, Stampin' Dimensionals and Pearls.

Thanks for stopping in today.  Leave me a note ... I'd love to hear from you.

Linda

Wednesday, April 6, 2011

I love punches ...

Stampin' Up! has the best punches.  They make all sorts of things from birds to flowers.  This card is a good example of that.  I found this card here.  I was so amazed that she had created this flower out of punches and matched the Designer Series Paper used I had to CASE it.   So you say ... "Linda, that DSP doesn't look familiar" -- well it's Paisley Petals which is a sneak peek to the 2011-2012 Idea Book & Catalog.  But you can have it now.  Just purchase $20 in Stampin' Up! products and you can purchase Paisley Petals DSP and/or Four Frames Stamp Set before the new catalog even comes out (DSP & Wood Stamp Set Item #125735; DSP & Clear-Mount Stamp Set Item #125736).  That's of "Spring is Blossoming" promotion that runs the entire month of April.  What a deal!

Now, you say ... What punches did you use, Linda?  Well, I used the Blossom Petals, Two-Step Bird, Boho Blossoms and the 1" circle punches.  There is a little trimming on some of the punched pieces to make the lovely flower.  I was going to make this card for my monthly Stamp-a-Stack class but it has a lot of teeny tiny little pieces to adhere together.  I think I'll show my customers how to make it but having everyone make two of these cards may be too much during class.  Hey, we don't want to be stamping & punching until midnight!!

Check back tomorrow for a look at some of the cards we will be making at my Stamp-a-Stack classes this month. 

Have a wonderful Wednesday!

Linda

Thursday, March 10, 2011

Spring is just around the corner ...

I feel like spring is "just around the corner." The rain, warmer weather and seeing a robin makes me believe that OR it could the beautiful spring cards that I made for my stamp-a-stack classes this month.

My first card uses the adorable ice cream parlor DSP which is part of our Sale-a-Bration promotion -- it's FREE with a $50 purchase. Just a quick plug -- Sale-a-bration ends on MARCH 31, 2011. If you haven't placed your SAB order with me, don't wait you may miss this great opportunity to get FREE stuff!

I CASEd this card here. Supplies used:  Melon Mambo, Pacific Point, Daffodil Delight and Old Olive card stock and Stampin' Write markers; Peach Parfait Stampin' Write marker; Ice Cream Parlor DSP; Scallop Border punch and button from Ice Cream Parlor Ribbon & Button Pack (Sale-a-Bration FREE item).


Easter Blooms -- I love this stamp set!  It is so beautiful and not just for Easter.  Check out the next two cards.  The first one is an Easter card that I was inspired by here.  Look closely -- I put pearls in the girl's basket to look like eggs!! 

Supplies used:  Easter Blooms stamp set; So Saffron, Perfect Plum, Wild Wasabi and Very Vanilla card stock; Basic Black embossing powder; Elegant Lines embossing folder; Scallop Oval XL and Oval Large punches; Very Vanilla taffeta ribbon, Basic Pearls and Stampin' Dimensionals.


This next card uses the tree branch of blossoms from the same stamp set.  I CASEd the card from Selene's blog.  I love her cards.  This one was just too beautiful to change.  I used the "resist" technique -- stamp the image using Stazon on glossy card stock.  Using a white crayon, color in the blossoms.  When you sponge the ink on the image, the blossoms that have been colored with the crayon will resist the ink.  It makes the blossoms pop!  Using that white crayon on white card stock reminds me of coloring Easter eggs.  We would use the same resist technique with the white crayon on the hard-boiled egg to make everyone an egg with their name on it!!!

Supplies used:  Easter Blossoms & All Holidays stamp sets; Springtime Vintage DSP; Glossy cardstock; Wild Wasabi card stock and ink; Very Vanilla card stock; Stazon and Baja Breeze ink; Framed Tulips embossing folder; white crayon and Baja Breeze seam binding ribbon.


This next card was made with one of my favorite customer's in mind -- Mary Ann.  She is a very talented seamstress and makes beautiful quilts for many people in our church.  In fact, I think every baby that has been born receives a quilt from Mary Ann.  When I saw the Sew Suite stamp set in the Occasions Mini, I knew I had to make a card that Mary Ann would love.  I CASEd the card here.

Supplies used:  Sew Suite & Teeny Tiny Wishes stamp sets; Sweet Stitches DSP; Regal Rose, Tempting Turquoise, Melon Mambo, Wild Wasabi and Whisper White card stock; Blender Pen; Perfect Polka Dots embossing folder, Modern Label  & Word Window punches, Whisper White taffeta ribbon, Pompom trim, Linen thread and Tempting Turquoise button.


My last card uses the Presto Patterns Specialty Paper requested by one of my other good customers -- Fran.  In fact, all I have are wonderful customers -- I love them all.  She has the paper but didn't know how to use it.  I was so glad that she asked and I was able to help her.  Remember, any product you have and want to know how to use -- just ask me.  I'm your personal crafty customer service specialist!!!

I CASEd this card here.  I used my brayer and Regal Rose ink to add color to the specialty paper.  It was very easy because the paper accepts the color so easily and what a beautiful result.  Notice that the flowers are stamped using the "rock 'n roll" technique.  Stamp the flower first in Regal Rose and then gently rock 'n roll the inked stamp on the Early Espresso ink pad -- then stamp on your card stock.  To soften the look I sponged everything using Early Espresso.

Supplies used:  Medallion, Vintage Vogue & Occasional Quotes (Hostess Level 3) stamp sets; Whisper White, Soft Suede, Crumb Cake and Early Espresso card stock; Presto Patterns Specialty Paper; Old Olive, Regal Rose and Early Espresso ink; Eyelet Border & Corner rounder punches; Old Olive 5/8" satin ribbon; Linen thread; Rhinestone Circle Fire brad; Neutral brads; sponge and Stampin' Dimensionals.


Thanks for stopping by and checking out my cards for this month's classes. I'd like to post more often and maybe I can make time to do that but you can always see the stuff I've been working on for my class by the 10th of each month.

Enjoy your day.

Linda

Wednesday, February 16, 2011

SAS ... SAB (Stamp-a-Stack ... Sale-a-Bation)

It's that time again -- Sale-a-Bration!  It's one of my favorite times of the year.  A time when we all can get FREE stuff and who doesn't like to get FREE STUFF!  If you don't know about Sale-a-Bration (or SAB for short), I'll tell ya ... if you spend $50 in Stampin' Up! merchandise you get a FREE SAB item out of the SAB mini catalog.  Click on the link at the right and check out the FREE stuff you can get.  Contact me and place your order now because Sale-a-Bration ends on March 31, 2011.


Here is one of the cards for my montly Stamp-a-Stack (or SAS for short -- you can tell I work for the government (USPS) because everything is an acronym!) class. I used one of my favorite SAB stamp sets -- "Sweet Summer."   I found the card sketch on the Clean & Simple blog as Challenge #113.  It was so simple -- yet was not a fast card because there is a lot of coloring as one of my customers pointed out!


This next card uses the same SAB stamp set as the one above and the lovely Designer Series Paper (DSP) from the Occasions Mini - Springtime Vintage.  I love the colors -- Baja Breeze, Pear Pizzazz, Always Artichoke and Very Vanilla.   It's just a nice springy card.  I was inspired by Sue Robertson on SplitCoastStampers.  Here is her card.


Here is another SAB stamp set -- "Bliss."  I think I like this one even more than Sweet Summer!  I was inspired for this card here.  I love the softness of the design behind the butterflies (I used Crumb Cake) and I used the "rock 'n roll" technique for the butterflies.  You ink up your image using a light color ink (Pretty in Pink) then before you stamp the image gently rock & roll the image on a darker color ink (Regal Rose) just touching the edges of the image with the darker color. You can't see it very well on the picture but it gave the butterflies nice dimension.  Okay, I also go a little crazy over the pearls -- LOVE EM!!


I found a new technique -- you ink the acrylic block and stamp on the card stock for a "tumbled tile" look.  I inked the "C" block using Crumb Cake and then lightly misted it using water in a spray bottle.  Immediately, stamp on the card stock and let it dry.  I stamped the tree using Early Espresso.  I cased this card here.  I added ribbon because I love ribbon.  I think it turned out nice.  It makes a nice sympathy card or masculine card.


I LOVE cupcakes.  They are so in right now.  Everyone is making cupcakes -- real and paper!  Of course, the real ones are better -- especially chocolate!!  Anyway, I wanted to try using the new pom pom trim and found this card so I cased it.  Check it out here.


This last card uses the Bold Blossom stamp set from the Occasions Mini Catalog. I love the spring colors -- Daffodil Delight, Certainly Celery, Melon Mambo and Tangerine Tango.  I cased the card here.


That's all for now.  Thanks for stopping by.

Linda

Tuesday, January 11, 2011

Flamingo Love


Here are the last two cards for my January classes.  They both use the new stamp set "Valentine Defined" from the Occasions Mini Catalog.  I love the little "kissing" flamingos.  For this first card I was looking to use other colors besides just red or pink.  My favorite color is green so when I found this card on another demonstrator's blog I just had to make it.  My inspiration came from here.  Supplies used are Old Olive, Pear Pizzazz, Pretty in Pink, Melon Mambo and Whisper White cardstock.  Melon Mambo, Old Olive and Pear Pizzazz Stampin' Pads, various punches and Pear Pizzazz ribbon.


This last card is my favorite of all the Valentine cards I've made so far.  It was so fun to make and pretty easy.  This demonstrator, Michelle, has perfected the art of using the brayer.  If you go to her blog, she makes beautiful cards of all shades and colors using the brayer.  I'm not nearly as good as she is but I don't think it's bad for my first attempt.  What do you think?  Supplies used are Melon Mambo, Rich Razzleberry, Basic Black and Whisper White card stock.  Melon Mambo, Rich Razzleberry, So Saffron, Old Olive and Basic Black Stampin' Pads.  Of course, the brayer and sponges too.  I can just imagine myself looking through the little heart-topped weeds to catch a glimpse of the two flamingos in love!!!  Michelle's blog is here.

Thanks for coming back to check out my cards.  I love showing off what I've been working on.  Don't forget -- stop back anytime and leave a comment!!

Linda

Friday, January 7, 2011

Love ... Love ... Love

Here is another card for my January Stamp-a-Stack.  I just love Valentine's Day -- don't you?  I was inspired for this card here.  I wanted to use our waffle paper  -- it's so easy to use and it adds a nice little "rufflely" effect.   The stamp set is Filled with Love from the Holiday Mini and I used Cherry Cobbler, Whisper White and Basic Black card stock.  I also used the pinking hearts border punch. 

That's it for today.  After work, I'm heading down to my workshop to finish designing my cards.  Check back to see what I get done this weekend.

Thanks for stopping in.

Linda

Wednesday, January 5, 2011

I'm Back ...

I checked the last time I posted and it was November 16, 2010. WOW ... it's a new year. How quickly time flies when you are busy! I took the month of December off of my SU business to concentrate on getting my handmade Christmas gifts finished and spend time with my family.

I have so much to tell you about the last month and a half but I first want to show you a few cards I've received and what I'm working on for my upcoming Stamp-a-Stack classes.

First is a "buddy swap" card I received from fellow demonstrator Trelvia. What an ingenious way to use the heart punches. The star is from the boho blooms punch. Great job, Trelvia.

Next is a Christmas card I received from another fellow demonstrator and good friend, Rita. Once again, she uses punches to create a beautiful "front door with wreath" Christmas card. I love it. When I told Rita how much I loved the card, she said she was busy making wreaths for Valentine's Day, Easter, etc. Maybe she'll send me one of those too!!


The last card I received was from my December buddy swapper -- Sarah. She used a new stamp set from the Occasions Mini -- Take a Spin. I wasn't sure I needed (more like wanted because I don't "need" any more stamps, LOL!) this stamp set but what a cute card to send a child or grandchild!


Okay, now for a sneak peak at this month's Stamp-a-Stack cards. It's Valentine's Day time and I enjoy all the LOVE! This first card was my buddy swap for December which I sent to my buddy, Carla. It actually is based on the card on page 43 of the Occasions Mini catalog. I used the single stamp "Be My Valentine." Check it out.


The next card uses the new "Valentine Defined" stamp set in the Occasions Mini. I CASEd the idea here. I changed it a little to use the supplies I had. It has a little sparkle to the hearts on the tree -- I used some Dazzling Diamonds.


Well, that's it for now. I'm back to my workshop tonight to create more cards for my classes. I'll share them soon.

Thanks for stopping by.

Linda